Polar SEO/AEO Checklist
11 steps to make your Webflow site visible to search engines and AI tools
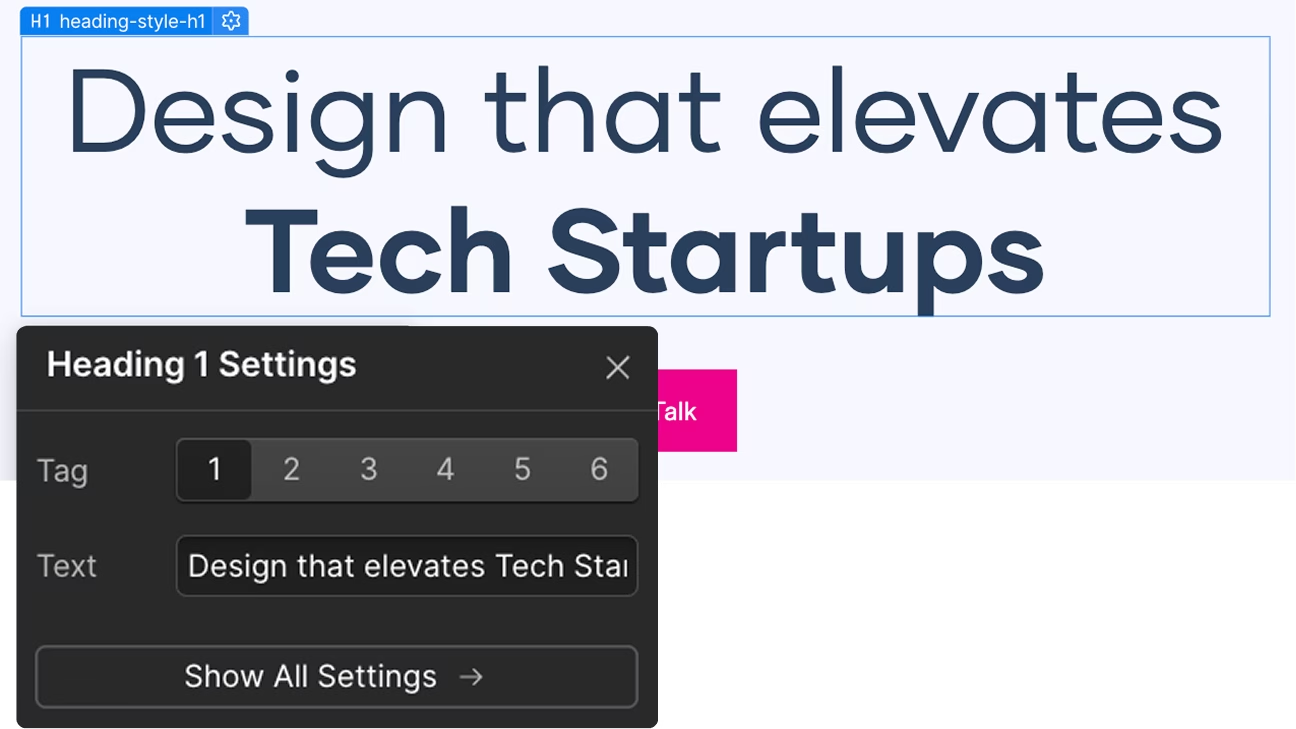
1. Headings
Use headings to guide users and search engines through your content.
Click any heading → click the gear icon (⚙) → select heading level (H1-H6)
H1: Use once per page as your main title.
H2: Use for main sections.
H3-H6: Nest under parent headings as needed (H3 under H2, H4 under H3, etc.).
2. Images
Add Alt Text to every image and icon in the Assets Panel.
Decorative elements: Mark as decorative (no alt text needed).
Compress all images to WebP/AVIF format and enable lazy loading for faster load times.
Improves both SEO and accessibility

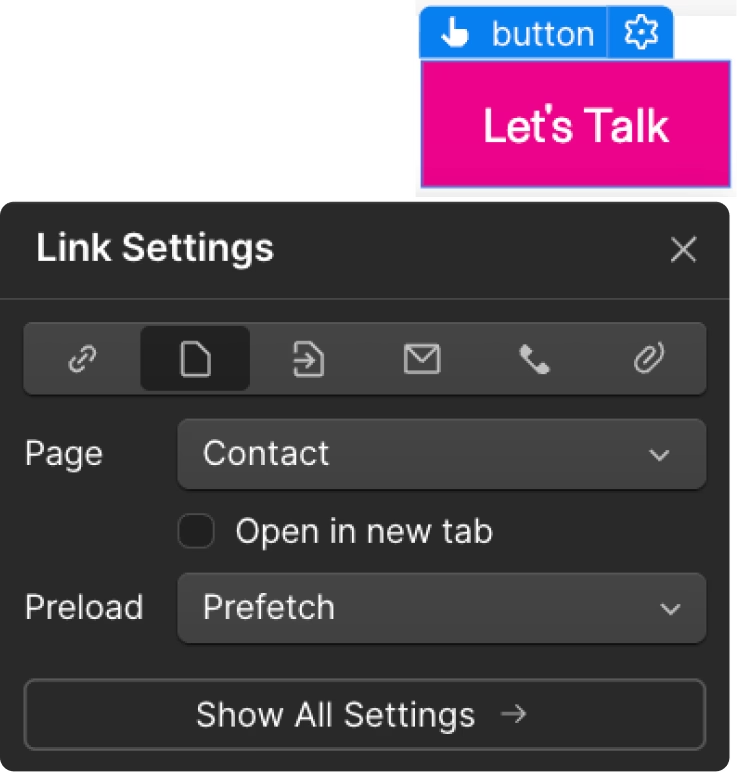
3. Links
Check that every link is set correctly and directs to the relevant page.
Set external links to open in a new tab.
Set the Preload option to Prefetch for every link in your project. It improves UX and makes page navigation faster.
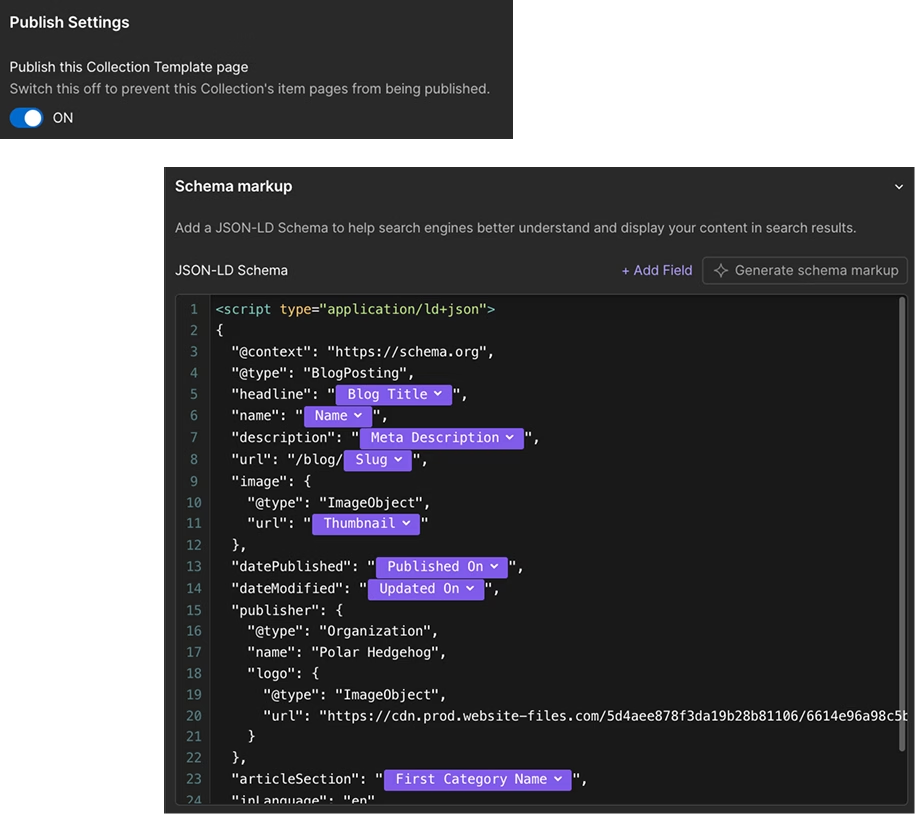
4. Collection Pages
Verify that relevant Collection pages are set to index in the Page Settings.
Unpublish empty Collection pages in the Page Settings.
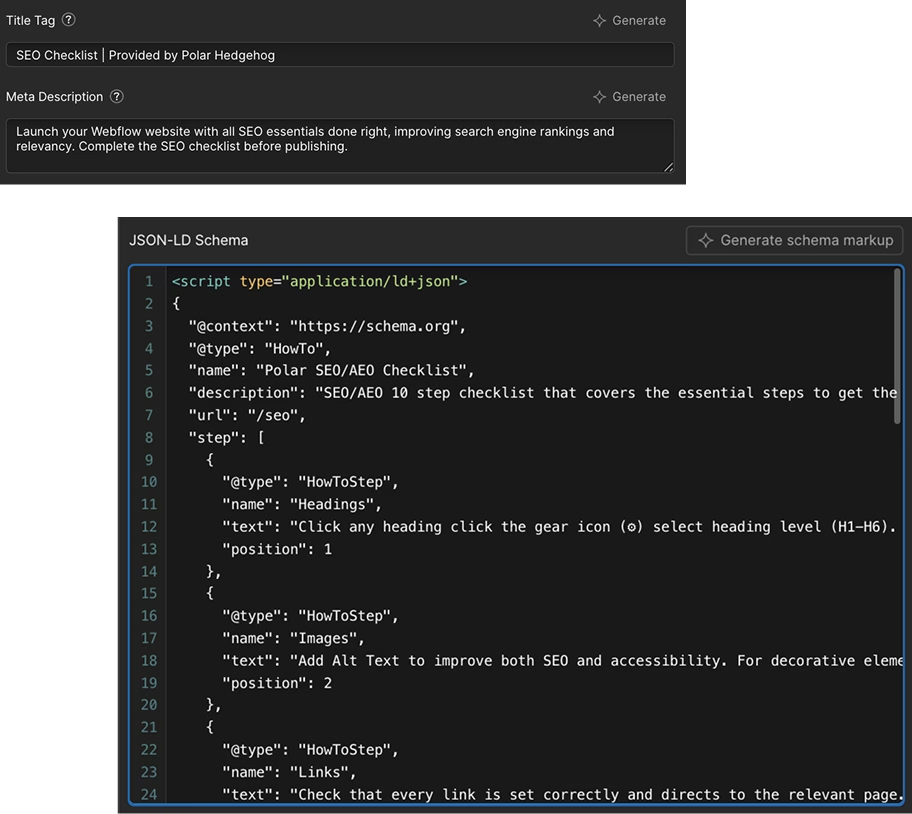
Create and add Schema markup specific to each CMS collection (e.g. Blog Posts, Products, FAQs) to help search engines better understand and display your content in search results.
5. Page Meta Settings
Head to your Page Settings.
Title Tag: Enter your page title (keep it under 60 characters for optimal display in search results).
Meta Description: Write a compelling description (keep it under 160 characters).
Schema Markup: Add or generate structured data markup relevant to your page type (Article, Product, Local Business, FAQ, etc.).
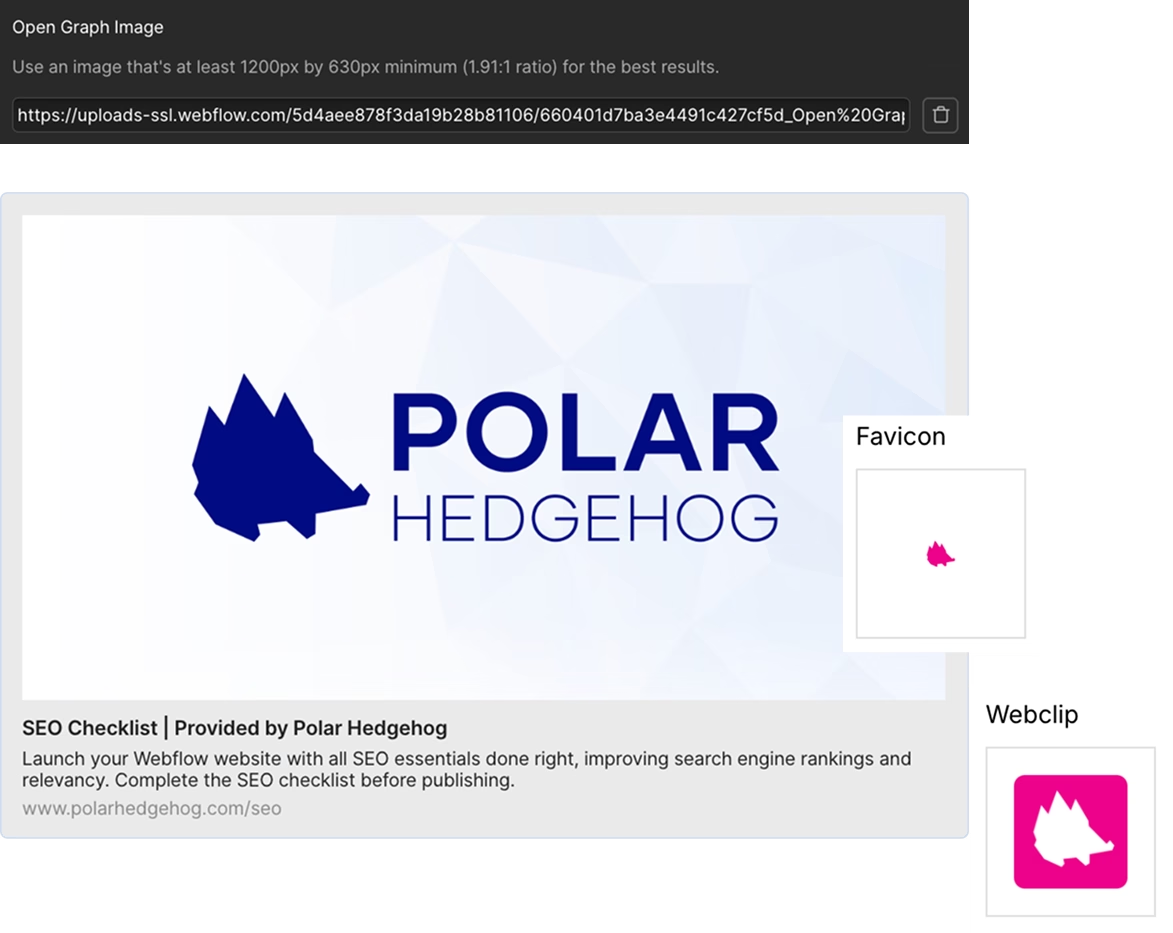
6. Open Graph & Site Icons
Copy your Open Graph image link from the Asset Panel
In your page settings, paste the link into the Open Graph Image URL field for every page.
In the General tab of Site Settings, add a favicon (the small icon shown in browser tabs) and a webclip (the icon displayed when a user saves your site to their mobile home screen).
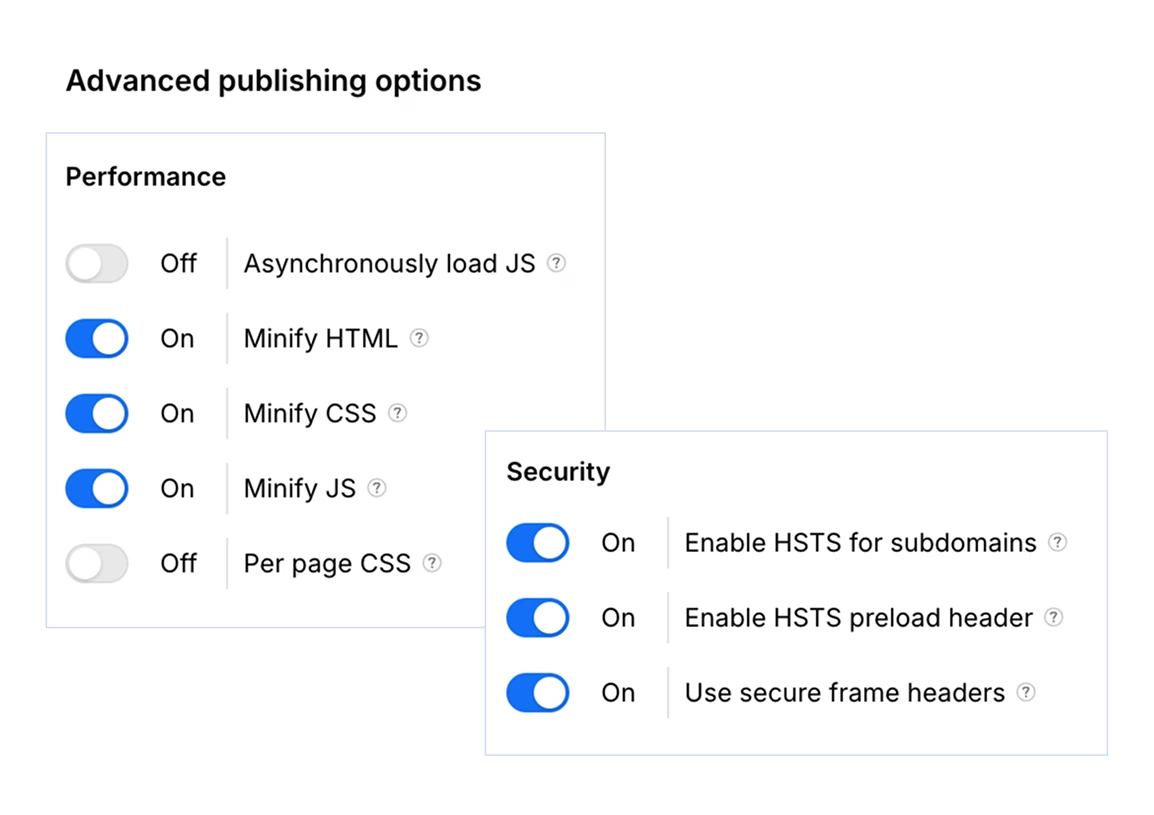
7. Publishing Settings
Navigate to the Publishing tab in Project Settings
Enable Performance options shown in this picture. This helps with page load speed.
Enable all Security settings. These ensure your site always uses HTTPS and is protected against common security threats.
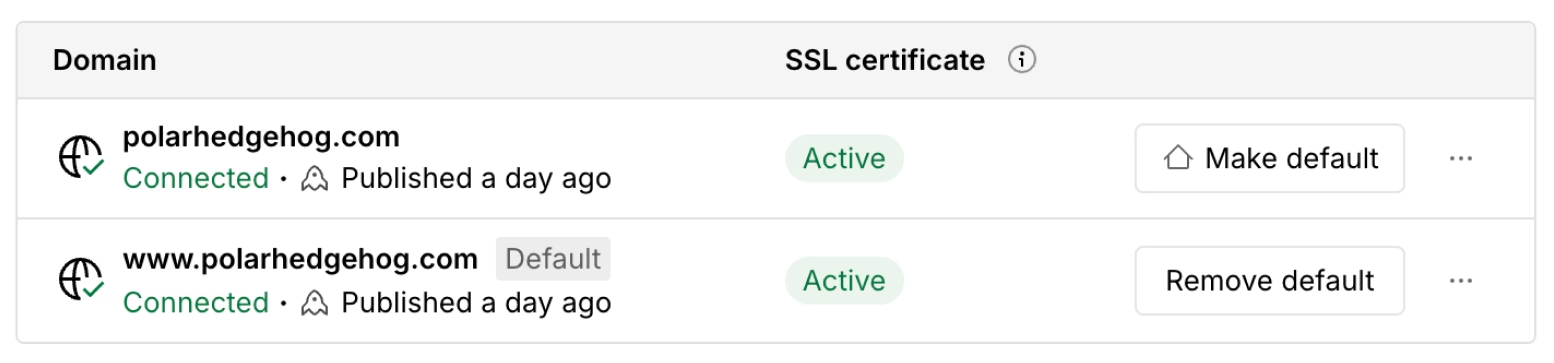
8. Default Domain
Navigate to the Project Settings
In the Publishing tab, set your Default Domain (strongly recommend using the "www." version)
Ensure your SSL certificate is enabled (HTTPS) in your Webflow project settingsA secure site is a Google ranking factor and builds trust with visitors
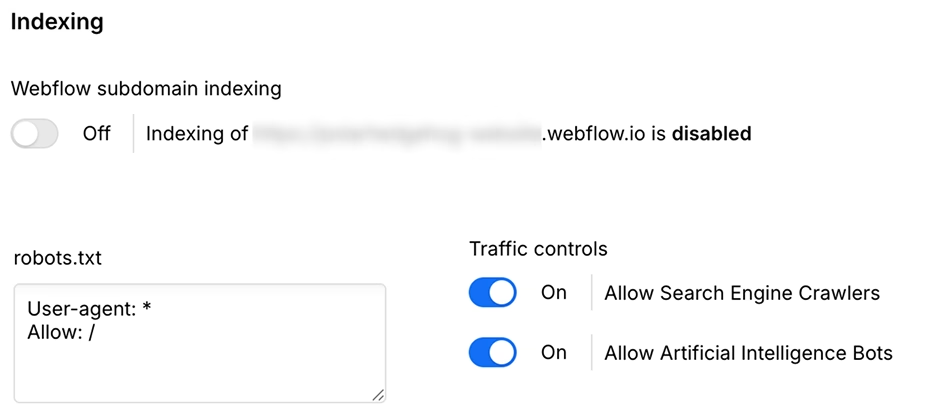
9. Website Indexing
Navigate to the SEO tab in Project Settings
Disable indexing of your webflow.io domain
Setup robots.txt: Copy the provided code and paste it into your robots.txt file
Enable Auto-generate Sitemap
In Traffic Control settings, enable:
Allow Search Engine Crawlers - ensures search engines can index your site
Allow AI Bots - allows AI platforms to crawl and reference your content

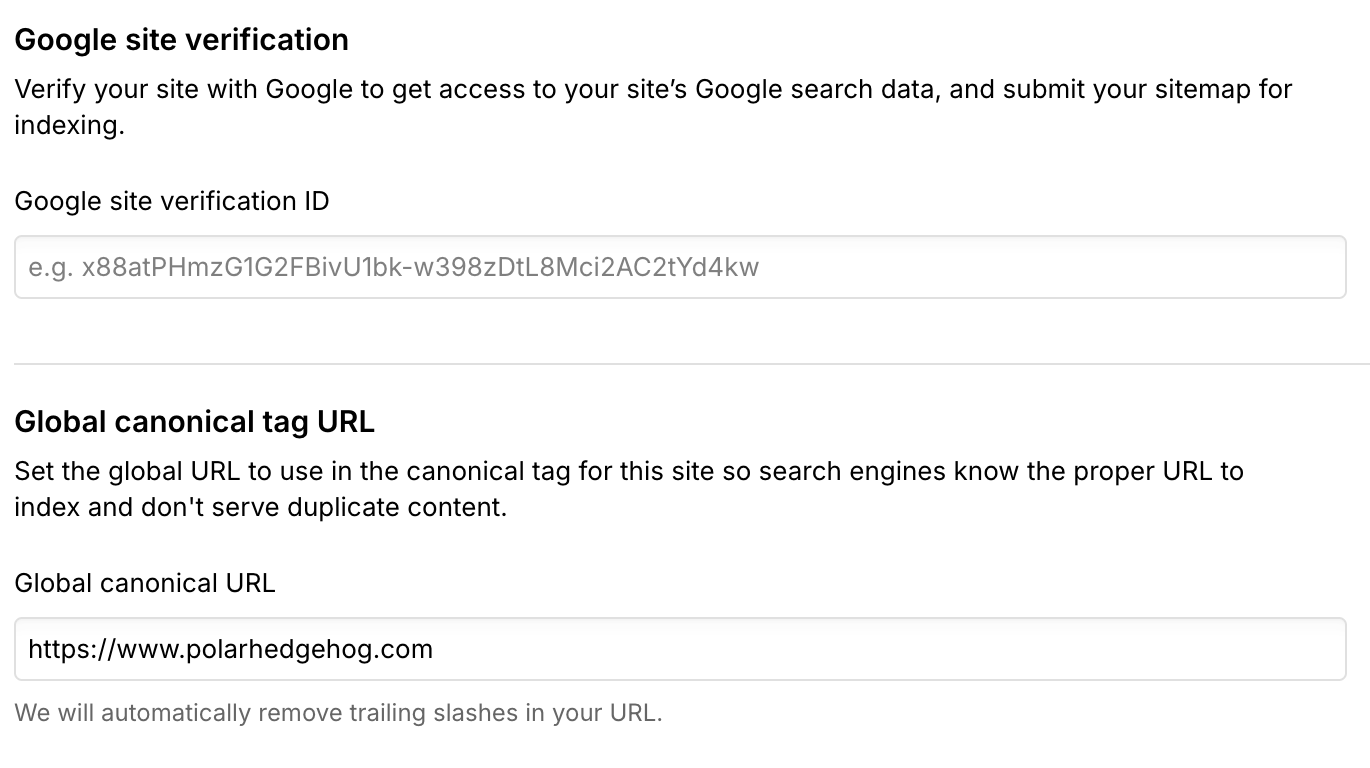
10. Google Site Verification & Canonical URL
Google Site Verification: Add your verification code from Google Search Console settings
Global Canonical Tag URL: Enter your website URL
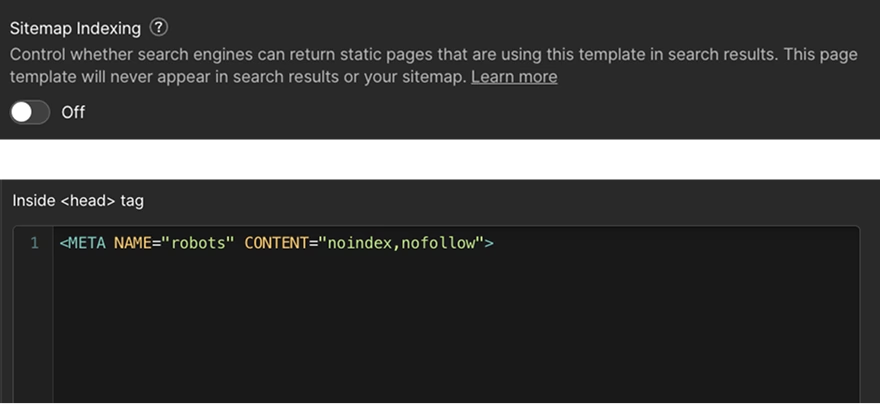
11. Utility Pages
Create and configure a custom 404 page - improves user experience when visitors land on a broken or missing link, and prevents negative SEO impact
Turn off Sitemap Indexing on utility pages (e.g. Thank You pages, 404, confirmation pages) to prevent them from appearing in search results
Add the noindex/nofollow script to your Page Settings inside the <head> tag